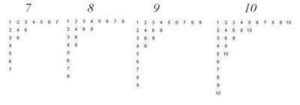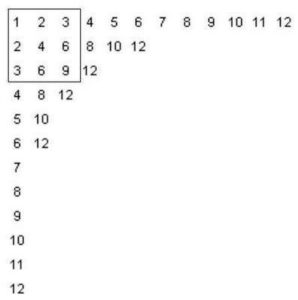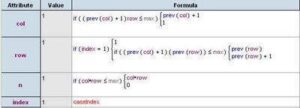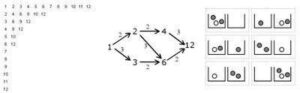
Metaphors and Mathematics 2

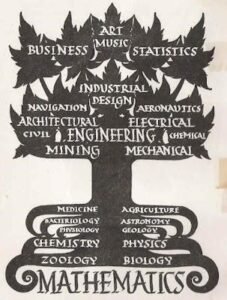
Robert Recorde, author the first English textbook on algebra (published in 1557), chose to give his book the metaphorical title The Whetstone of Witte to encourage people to take up the new and difficult practice of algebra. The metaphor of a whetstone, or blade-sharpener, suggests that algebra is not only useful, but also good mental exercise. In the verse that he included on its title page, he writes,

Its use is great, and more than one. Here if you lift your wits to wet, Much sharpness thereby shall you get. Dull wits hereby do greatly mend, Sharp wits are fined to their full end.

Mathematics, and algebra in particular, according to The Whetstone of Witte is like a knife-sharpener for the brain. Four hundred years later, in his book Mathematician’s Delight (1961), W.W. Sawyer takes up a similar metaphor, suggesting that “Mathematics is like a chest of tools: before studying the tools in detail, a good workman should know the object of each, when it is used, how it is used.” Whether they describe mathematics as a sharpener or other tool, these mechanical metaphors are commonly used to emphasize the practicality and versatility of mathematics, particularly when employed in engineering or science, and suggest that it should be used thoughtfully, and with precision.

An often quoted mechanical metaphor that suggests a more frantic and less precise process of mathematical creation is often attributed to Paul Erdos: “a mathematician is a machine for turning coffee into theorems.”

For more such insights, log into www.international-maths-challenge.com.

*Credit for article given to dan.mackinnon*



Cut-and-Glue Polyhedral Models

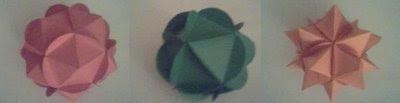
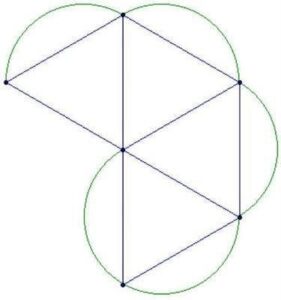
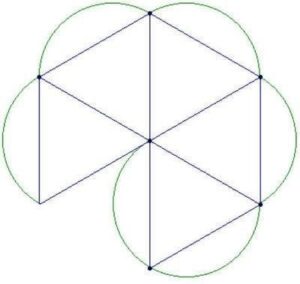
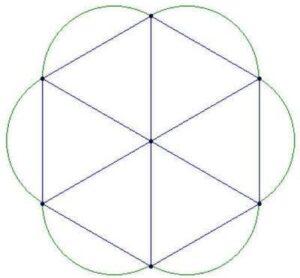
Building polyhedral models is a nice way to explore a lot of significant mathematics. The above models were made by printing patterns onto card-stock, cutting them out, and gluing them together. For these models, only triangular faces were used. These can give you a wide variety of cumulated (or augmented) polyhedra. The triangular faces are circumscribed to provide tabs that you glue together. You can fold and glue the tabs so that they are inside the models, but it is easier to leave them out, and they look nice this way (I think).
1. Decide on a model that you would like to make, and figure out how many faces you will need.
2. Copy and paste the images below into a document or presentation slide (PowerPoint works well) for printing. Choose the right ones for your model, and fit as many as you can on a single sheet.
3. Print out onto card-stock. Most desk ink-jet printers can take card-stock instead of printer-paper.
4. Cut out the units, fold the tabs, and assemble and glue.
Throughout this process, it helps if you have pictures of the polyhedra that you want to construct. Poly is a nice software package for browsing through families of polyhedra.
I’ve found that it works well to bend the tabs using a ruler, that glue-sticks provide the best gluing, and that it helps to hold the model together with binder-clips while assembling.

For more such insights, log into www.international-maths-challenge.com.

*Credit for article given to dan.mackinnon*

Phyllotaxis Spirals


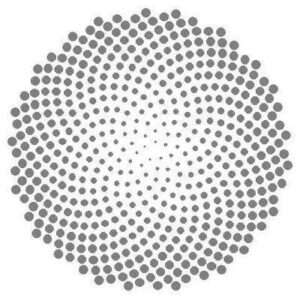
Phyllotaxis is a term used for the patterns that emerge in the growth of plants. Spiral phyllotaxis is observed in the heads of sunflowers, in pine-cones and pineapples, and in a variety of other plants.

Phyllotaxis is a popular topic in mathematics recreation – it’s interesting in its own right and also related to other perennial favourites, Fibonacci numbers and the golden ratio.

The article Modeling Spiral Growth in a GSP Environment describes how to model phyllotaxis-like patterns in GSP. Although GSP works reasonably well, TinkerPlots or Fathom environments seem to be better suited to capturing this particular model – they make the formulas more explicit and easy to manipulate, and they allow for the data generated to be viewed in a variety of ways. The images above were created by porting this model to TinkerPlots.

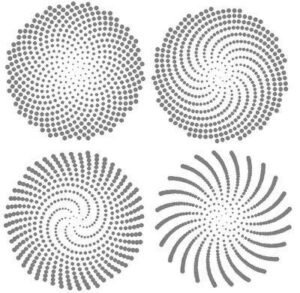
As the article suggests, experimenting with the the angle between successive seeds allows you to see different resulting patterns – angles that are multiples of rational numbers create patterns of rays while irrational numbers (actually approximate values) give spirals, or spiral/ray combinations (the rays form as the approximation gets more “rational”). A good choice for approximating actual phyllotaxis patterns is to use tau = (1+sqrt(5))/2 in your angle. Here is a listing for the attributes required to generate the pattern in TP or Fathom. The graph/plot is simply the x attribute on the horizontal and the y attribute on the vertical (in TP these need to be fully separated).

n = caseIndex
base_angle = pi*(1+sqrt(5))
r = sqrt(n)
theta = n*base_angle
x = r*cos(theta)
y = r*sin(theta)

The images shown in this post use a collection of 500 cases or “seeds”. The base angle is 2pi*tau, and the actual angle for a given seed is a multiple of this base angle.

The model is nice looking and easy to build, but it models only the end result of the growth process, not the process itself. It winds new seeds around the outer edge based on a pre-determined angle. A better model would be one that mirrors what is understood to be the underlying phonomena – new seeds are added to the center and old seeds are pushed out following a set of rules. Under this dynamic method, the angles and spirals are an emergent aspect of the system, rather than the explicit result. This website describes how such a dynamical system could be modeled.

Although the Fathom/TP model does not model the dynamical system that underlies phyllotaxis, it’s fun to play with in its own right. You can manually alter the base_angle attribute as suggested by the GSP article. If you add a parameter (a slider) to help you vary the angle, you can obtain a whole family of spiral/ray patterns whose properties you could take a closer look at. Different combinations of angles and sliders will give you various levels of control over the image.

For example, change the formula for base_angle to base_angle = pi*(1+sqrt(5))*base, and create a slider “base”. The image below shows the spirals obtained for base = 1…6.

Update: Here is an example of how to draw spirals like this in R.

For more such insights, log into www.international-maths-challenge.com.

*Credit for article given to dan.mackinnon*


Polygonal Number Formulas

Polygonal numbers are a mainstay of recreational and school mathematics, providing a nice bridge between numbers and shapes. The diagrams above show some of the hexagonal numbers.
Some examples of two-dimensional polygonal numbers are:

the triangular numbers: 1, 3, 6, 10, 15, …
the square numbers: 1, 4, 9, 16, 25, …
the pentagonal numbers: 1, 5, 12, 22, 35,…
the hexagonal numbers: 1, 6, 15, 28, 45, …

Comparing the listing for the hexagonal numbers with the diagrams above, you can see how the sequences are built diagrammatically. In general, beginning with a single dot, k-sided polygons are built by adding layers (called gnomons) consisting of k-2 segments, with each segment of the gnomon having one more dot than the segments of the previous layer. In this way, the nth gnomon consists of segments each n dots long, but with k-3 dots shared by adjoining segments (the corners).

The description above can lead you to a recursive formula for k-polygonals, writing p_k,n for the nth k-polygonal number:

Unwinding the recursion gives you a summation formula for k-polygonals:

Knowing a little about sums gives you the direct formula for k-polygonals:

Coming a little out of left-field is this combinatorial formula for k-polygonals:

This last formula expresses two ideas: that the triangular numbers correspond to the r=0 column of Pascal’s triangle, and that every polygonal number can be “triangulated”:

The combinatorial formula for p_kn can be generalized to higher-dimensional polygonal numbers (pyrimidal numbers, etc.).

The recreation here lies in showing that the various formulas for p_k,n are really the same, and then exploring the relationships between the different k-polygonals. A great resource is J.H. Conway and R.K. Guy’s The Book of Numbers.a

For more such insights, log into www.international-maths-challenge.com.

*Credit for article given to dan.mackinnon*


Sonobe Phizz Duality

Sonobe and phizz modular origami units are assembled into polyhedral models in similar ways, but the models that they produce are “dual” to each other (vertices in one correspond to faces in the other). Assembling models out of sonobe and phizz units with this duality in mind provides a nice way of exploring duality and the relationships between edges, faces, and vertices.

The sonobe and phizz modules are both examples of edge modules that come together in groups of 3. In both cases, when the units come together in their groups of 3 they meet in a small triangular pyramid. These pyramids in turn come together in clusters of 3 to 6. The essential difference between the phizz and sonobe modules is in how these clusters form. In the phizz, there is a gap between the groups, so the resulting cluster seems to form the edges of a polygon. In the sonobe, the gap between the groups is small, so the cluster seems to form around a point. Consequently, in the phizz, the center of the cluster takes on the role of a polygonal face, while in the sonobe it is takes on the role of a vertex. Meanwhile, the pyramids formed by the groups of three units become raised vertices in the phizz unit, while in the sonobe they become cumulated faces of the resulting polyhedron.

We naturally interpret what phizz modules generate as polyhedral skeletons, while we see the shapes generated by sonobe as cumulated (or augmented) polyhedra. The fact that this different interpretation is based on the size of the gap that forms in the center of the module clusters suggests that seeing an origami model as a particular polyhedron or its dual is, to some extent, a matter of perception and interpretation.

In phizz models, the fact that the modules come together in groups of 3 dictates that the finished models have vertices of degree (or valence) 3, while in the sonobe case, the 3 units come together to make triangular faces. Dual models have the same number of edges, which corresponds to the number of modules required to build the model.

Some of the models that you can build are summarized below. The picture at the top of the post shows the 30-unit phizz dodecahedron and its dual, the 30-unit sonobe icosahedron.

For more such insights, log into www.international-maths-challenge.com.

*Credit for article given to dan.mackinnon*


Digit Patterns in Power Sequences

Looking at the last few digits that appear in the numbers that form the sequence b^0, b^1, b^2, b^3, … for b a positive integer, you’ll notice that the digits will always begin to repeat after a certain point. For example, looking at the last digit of the sequences for b = 2, 3, and 4 we have the sequences

b = 2: 1, 2, 4, 8, 6, 2, 4, 8, 6, …
b = 3: 1, 3, 9, 7, 1, 3, 9, 7, …
b = 4: 1, 4, 6, 4, 6, 4, 6, …

If we look at the sequence of last two digits of these sequence where b =2 we have

b = 2: 1, 2, 4, 8, 16, 32, 64, 28, 56, 12, 24, 48, 96, 92, 84, 68, 36, 72, 44, 88, 76, 52, 4, …

This sequence then repeats the loop that began at 4.

We can describe these sequences as T_b,d(n) = (b^n)mod 10^d. Recursively, T_b,d(n) = (T_b,d(n-1)*b)mod 10^d

These sequences are always eventually periodic. Although these sequences are simple to understand and calculate, there are several interesting ways of describing them.

For example, you can think of the elements of T_b,d as a commutative monoid, with multiplication defined as a*b = (a*b)mod 10^d. They form a monoid since 1 is always a member, and you can show that T_b,d is closed under the * operation. It turns out that for some values of b, and d, T_b,d is a group.

You can also think of this set as a finite state machine or graph, where each element is a node and the transition from one node to the next is defined by the operation *b mod 10^d. This provides a nice way of displaying the sequences. The pictures in this post were created by writing a short program to calculate the sequences, and then formatting the output to draw a di-graph in SAGE. The graph at the top of the post is for b=8, d=1, while the graph below is for b=2, d=2. The graph at the bottom of the page is for b=7, d=1.

For more such insights, log into www.international-maths-challenge.com.

*Credit for article given to dan.mackinnon*


Higher Polygonal Numbers and Pascal’s Triangle

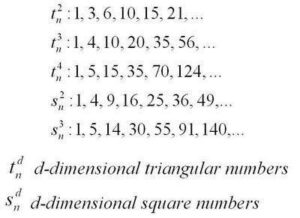
The third diagonal column in Pascal’s Triangle (r = 2 in the usual way of labeling and numbering) consists of the triangular numbers (1, 3, 6, 10, …) – numbers that can be arranged in 2-dimensional triangular patterns. The fourth column of Pascal’s triangle gives us triangular-based pyramidal numbers (1, 4, 10, 20, …), built by stacking the triangular numbers. The columns further out give “higher dimensional” triangular numbers that arise from stacking the triangular numbers from the previous dimension.

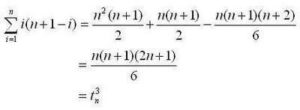
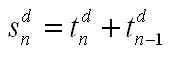
It is not by coincidence that the triangular and higher-dimensional triangular numbers appear in Pascal’s Triangle. If you think about layering of polygonal numbers in terms of equations, you get

In the above equation p^d_(k,n) is the nth k-polygonal number of dimension d. Triangular numbers are the 3-polygonal numbers of dimension 2, square numbers are the 4-polygonal numbers of dimension 2, “square based pyramidal numbers” would be denoted as p^3_(4,n).
from the sum above, you can obtain this equation:

Which looks very much like the Pascal Identity C(n,r) = C(n-1,r-1) + C(n-1,r), except for some translation of the variables. To be precise, if we consider the case where k=3 and use r = d and n‘ = n+d-1 we can translate the triangular numbers into the appropriate positions in Pascal’s Triangle.

Along with the definitions for the end columns, the Pascal Identity allows us to generate the whole triangle. This suggests the following strategy for calculating the higher k-Polygonal numbers: create a modified Pascal’s Triangle whose first column is equal to k-2 (instead of 1), and whose last column is equal to 1 (as usual). This modified Pascal’s Triangle is generated using these initial values and the usual Pascal Identity.

Here is an example with k=5, which sets the first column values equal to 3 (except for the top value, which we keep as 1) and yields the pentagonal numbers (column 3) and the higher pentagonal numbers.
The formula for these modified Pascal Triangles is given by this equation:

If we apply the change of variables mentioned above, we can obtain this general formula for the higher polygonal numbers in terms of combinations:

This formula illustrates how polygonal numbers are built out of triangular numbers. It says that the nth d-dimensional k-polygonal number is equal to the nth d-dimensional triangular number, plus (k-3) copies of the n-1 d-dimensional triangular number. This is a little easier to understand when you forget about the higher-dimensions and look at the regular 2-dimensional polygonal number.

For more such insights, log into www.international-maths-challenge.com.

*Credit for article given to dan.mackinnon*


Pi Color Map

John Sims has created a number of pi-related art works. One, the Pi Color Map, can be recreated effectively using TinkerPlots. The image above is one such Pi Color Map, using 2281 digits of pi.

Here are some instructions for creating a Pi Color Map in Tinkerplots.

1. Obtain a listing of the digits of pi – up to a reasonable number. You can get the digits from several sites, including the pi day site.

2. Paste your listing to a text document, and get them arranged into a single column. One strategy for doing this is and use the find/replace feature of a word-processor to replace each number with the number itself plus a line-break(e.g. in Word, replace 2 with 2^l, etc.).

3. If you’ve included the decimal point, remove it. For the first line of your document, provide a heading like pi_expansion. This will be your TinkerPlots attribute.

3. Import the text file into TinkerPlots using the File>Import menu.

4. Create a new attribute called digit whose formula is digit=concat(“”,pi_expansion). This creates a categorical data type that TinkerPlots won’t treat numerically. This is what you will use as your color key. Using the pi_expansion attribute gives a spectrum of color, rather than distinct colors for each number.

5. Create a new attribute called place, whose formula is place=caseIndex. This is what you will order your plot by.

6. Create a new plot, lock the color key on the digit attribute. Select the place attribute and press the Order By button.

7. Change your icon type to small squares, and stack the cases.

You can play with different options to get different effects for your color map.

One nice thing about doing this in TinkerPlots is that you can investigate the data further. The color map plot highlights the apparent randomness of the pi expansion, but you can also create other attributes and plots to investigate things like the running average of the digits, occurrences of consecutive digits, and the overall distribution of the digits (it should be uniform).

For more such insights, log into www.international-maths-challenge.com.

*Credit for article given to dan.mackinnon*


Digit Patterns in Square Numbers

If You take a look at the square numbers (n^2, n a positive integer), you’ll notice plenty of patterns in the digits. For example, if you look at just the last digit of each square, you’ll observe the repeating pattern 1, 4, 9, 6, 5, 6, 9, 4, 1, 0, … If you construct a graph of “last digit” vs n (like the one below, built with Falthom), the symmetry and period of this digit pattern is apparent.

Why does this happen? The periodic nature of the pattern is easy to understand – when you square a number, only the digit in the ones place contributes to ones place of the product. For example, 22*22 and 32*32 are both going to have a 4 as their last digit – the values in the tens place (or any other place other than the ones) do not affect what ends up as the last digit.

The reason for the symmetry about n=5 is a little less obvious. To see what is going on, it is helpful to use modular arithmetic and to realize that ” last digit of n” is the same as “n mod 10”. Considering what 10-n looks like mod 10 after it is squared, we have the equation below.

This tells us that the last digit of (10-n)^2 is the same as the last digit of n^2, because everything else that is different about these two numbers is divisible by 10.

If you look at the last two digits of the square numbers, you see another repeating pattern that has similar symmetries.

This is a nice looking graph – the period is 50 with a line of symmetry at n=25. You can think about it in the same way as the one-digit case, this time the symmetry is understood by looking at (50-n)^2 mod 100. (Looking at numbers mod 100 tells us their last two digits.)

If you decide to investigate patterns in cubes or higher powers, you’ll see somewhat similar results. Using the binomial theorem and modular arithmetic, you can see why even powers give symmetry similar to the n^2 case, while odd powers do not (although all are periodic).

This graph shows the pattern in the last digit of n^3.

This last graph shows the pattern for the last two digits of n^4.

For more such insights, log into www.international-maths-challenge.com.

*Credit for article given to dan.mackinnon*


Sonobe cut-out-module

Although creating origami sonobe units is likely to be considered by most to be an essential part of making sonobe polyhedra, a cut-out version of the sonobe module can be used to help beginners learn how to weave the units together.

The unit pictured here can be reproduced multiple times in a document (a PowerPoint slide works well, since you don’t have to worry about margins), and printed onto card stock. Printing onto card stock gives a solid unit to work with, while regular paper will likely be too flimsy.

After printing, cut out each unit and cut slits into them along the bold horizontal lines (a utility blade or exacto-knife works well). Depending on whether you want to hide the printing or not, you can mountain-fold the diagonal line and vally-fold the dotted vertical lines, or vice-versa (all modules should be folded the same).

You will need 6 units for a cube, 12 for an “augmented octahedron”, and 30 for an augmented icosahedron. Models can also be assembled from 3 units (a triangular di-pyramid) 9 units (two fused cubes), and other combinations.

The main idea in creating this module was to create a set of reusable units that could be used in professional development workshops for teachers learning modular origami for the first time. After seeing how the units hold together, the next step is to learn how to fold the units from paper.

To construct smaller modules, simply connect less than 5 units around. A 4 unit base will form the pattern for the augmented octahedron (which will take a total of 12 units). A 3 unit base will form the pattern for the cube (which will take a total of 6 units).

For more such insights, log into www.international-maths-challenge.com.

*Credit for article given to dan.mackinnon*